How to make Mysore Pak (with step by step pictures)
The popular Mysore Pak didn't make it to my favorites list until I tasted the soft Mysore Pak that became widely available in stores. This recipe will result in a neither too soft, nor too hard Mysore Pak; it wouldn't be greasy on your fingers but would crumble as soon as it touches your pearly whites. This is an excellent sweet to make for festivals like Diwali as it stores well for weeks together. Once you get the hang of it, this is also an easy sweet to make with just a few commonly available ingredients, right at home. This is one dish, that will keep you on your toes, but the results are well worth the effort.
, besan burfi,")
, besan burfi,")
Ingredients:
Bengal Gram Flour - 1 cup
Refined Sugar - 2.5 cups
Water - 1 cup
Ghee - 3/4 cup
Oil - 1/4 cup
Ghee - 1 Tbsp for greasing the tray
Special equipment needed:
a tray/plate with a rim
, besan burfi,")
- Dry roast the gram flour lightly on a low-medium flame, making sure it doesn't change color. Sieve & set aside.
- Heat a heavy kadai with sugar & water, stirring often until the sugar dissolves & you get a thick syrup with 1 string consistency. With caution, touch the syrup with your forefinger & test it between the thumb & the forefinger, by pulling the fingers apart a couple of times - you should see a thin string is forming between your fingers.

- When the syrup is almost ready, heat the Ghee & oil together in another pan on low heat. Keep this on low heat until you are done making Mysore Pak. Do not turn off the heat.

- When the syrup is ready to sprinkle the flour, little at a time; while stirring constantly to break the lumps if any until you have dropped all the flour into the syrup. Continue stirring.
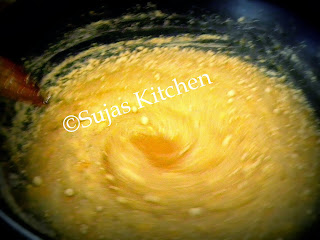
- Once the flour is added to the syrup, keep stirring constantly until the flour is well blended with the syrup & the mixture resembles a smooth gravy. (Use a whisk if required, to break lumps).

- IMPORTANT - Keep stirring, during the whole process & remember to keep the heat on low or just slightly higher than low.
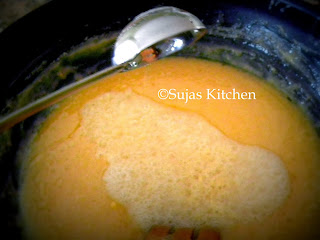
- Stop stirring at intervals & watch it for a minute, until you see the mixture frothing/bubbling up in the center. This is the time, you would start adding a ladle of the Hot Ghee-Oil mixture from the other pan to this Flour-Syrup mixture.

- Add one ladle of the smoking hot ghee-oil mixture to the kadai (You will see a lot of bubbles when this is done right) & stir until it blends with the mixture.
- After a few seconds, repeat the above step over & over again until you have used up all the of the hot ghee-oil mixture while stirring continuously.
- The Ghee-Oil mixture has to be very hot because we are trying to fry the flour-Syrup mixture by pouring hot ghee over it.
- By this time you will notice that the flour mixture has been absorbing all the ghee you have been pouring into it. Also, you will notice that the quantity of the flour mixture has risen considerably since the beginning (mostly because of frothing).

- The time to turn off the heat is when you notice that the stirring action of the ladle, leaves a trace in the pan/kadai (i.e; the mixture has thickened up considerably, thus taking more time to cover the tracks of the ladle).

- If you have crossed the above stage, then you would notice that the mixture has transformed from a thick batter consistency into one big mass that goes around the pan - REMOVE FROM HEAT IMMEDIATELY.
- Remember that the mixture will harden further, once it is cooled. So if you let it get hard in the pan - you have gone too far!
- After step 12, pour it onto a greased tray & flatten lightly.

- After 10 minutes of cooling, slice/score it up into desired size & shape, clean the knife after every line you make, for better results. Do not attempt to remove the pieces now, or they might crumble.

- Let it cool completely, Keep a plate on top of the tray & flip it upside down; give it a gentle pat if needed, to get the pieces of Mysore Pak on to the plate. This is a foolproof way to make sure your pieces don't crumble while trying to get them out of the tray.

- Once it's completely cool, store in a air-tight container & relish for days in a row.


No comments:
Post a Comment